If you’ve ever used Outlook, you’ll know how handy the preview pane can be. Gmail has its own version called the Reading Pane, which lets you see your emails side-by-side with your inbox.
Below is how to set it up and use it, step-by-step. And if you’d prefer to watch a quick video instead, just scroll to the end of this post. :)
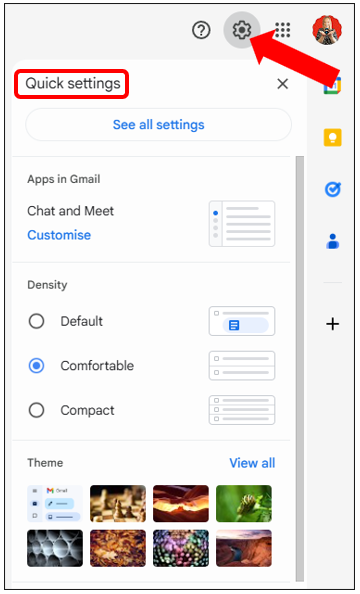
Step 1: Open Quick Settings
Click the gear icon in the top-right corner of Gmail. This opens your Quick settings panel…
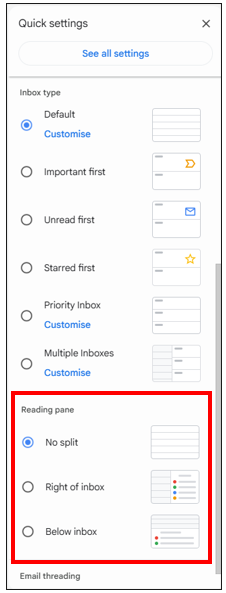
Step 2: Choose Your Reading Pane Layout
Scroll down to the Reading pane section, and select the layout you prefer:
- Right of inbox – emails open to the side.
- Below inbox – emails open underneath your list.
- No split – turns the Reading Pane off.
NOTE: When you first enable the Reading Pane, Gmail will reload automatically.
Step 3: Resize the Pane
Once the Reading Pane is visible, hover over the dividing line.
To resize the space, click and drag left/right (for vertical split)…
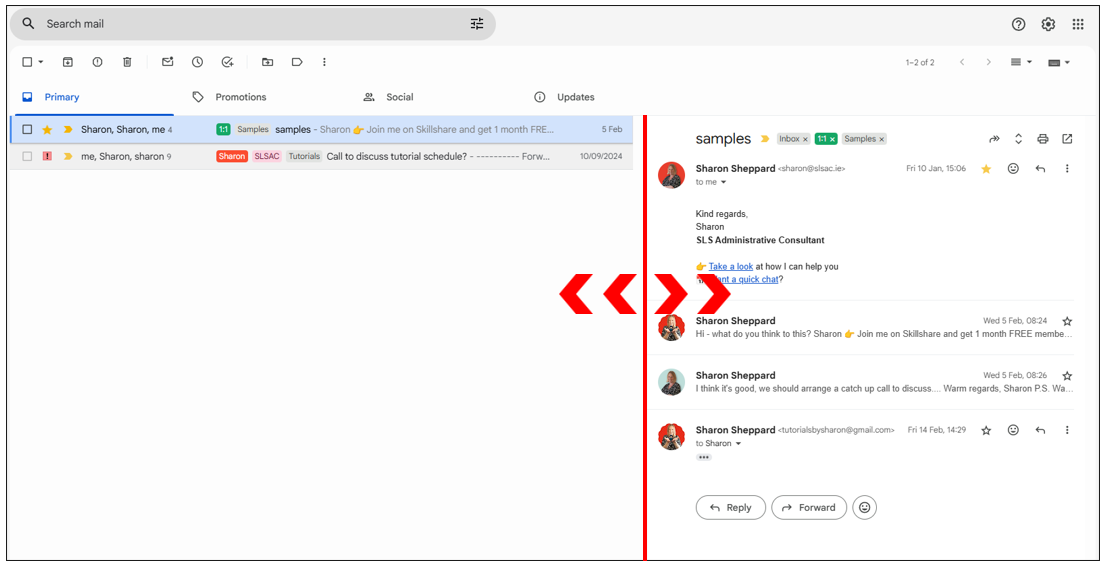
or up/down (for horizontal split)…

Step 4: Use the Toolbar Icon
At the top right of your inbox, you’ll see a Reading Pane icon on the toolbar. Use this to quickly toggle between vertical, horizontal, or no split – without needing to go back into settings. Even if you switch it off, this icon stays available so you can bring it back in one click…
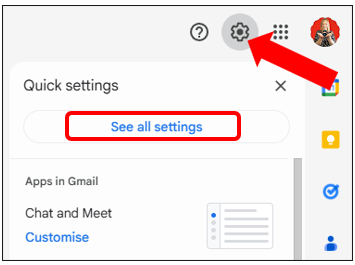
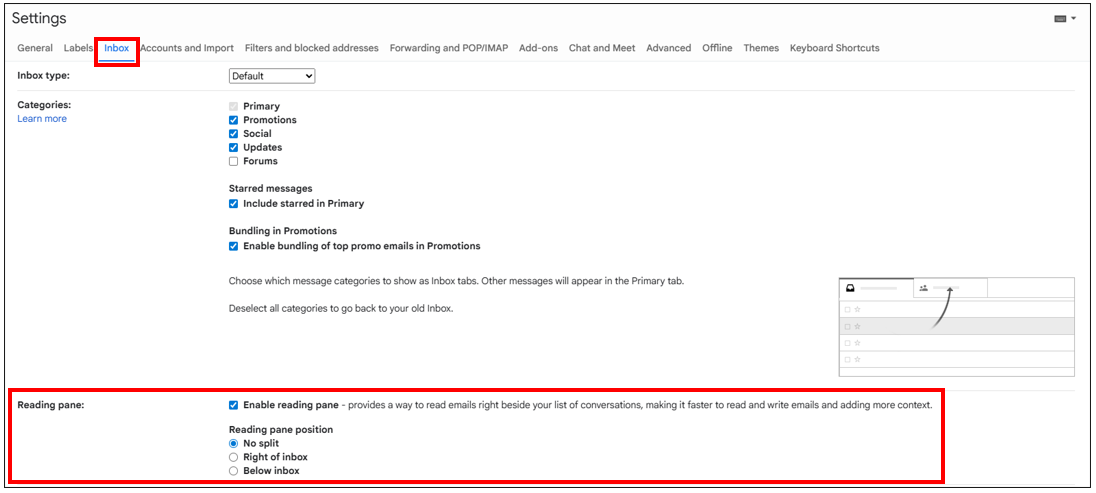
Step 5: Enable from Full Settings (Alternative Method)
You can also adjust the Reading Pane from your main Gmail settings:
- Click the gear icon > See all settings.
- Go to the Inbox tab.
- Scroll to the Reading Pane options and choose your layout.
- Scroll down and click Save changes.
And that’s it! Your Gmail inbox now has a built-in preview feature, letting you read emails more efficiently without constantly opening and closing them.
If you’d like to see it in action, here’s the link to video tutorial: https://youtu.be/u1cupPzb0bU